

はじめに
こんにちは、株式会社アドグローブのゲーム事業部エンジニアの遠藤です。
みなさんUnreal Engine4でゲームを作る場合は
ブループリントで作成しますか?それともC++で作成しますか?
私は、今までコードベースでゲームを作ってきた事と、ブループリントのようなビジュアルスクリプトに慣れていないという事もあり、C++でゲームを作りたいと思っています。
しかしながら、ネットで調べてみても何故かブループリントを使った作り方を紹介している記事が多く……なかなかその情報が出てこないですよね。
ということで、今回は手探りで触って動かして知り得た情報となりますが、C++を使ってゲームを作るため勉強した内容を発信していきたいと思います。
※使用するUnreal Engine4のバージョンは[4.26.2]となっています
1 タイトルシーンを作ってみる
1-1 レベル(マップ)を作る
まずはレベルを作成します。
ファイル → 新規レベル... → 空のレベル でレベルを作成する事ができます。
1-2 ウィジェットブループリントを作る
 次にウィジェットブループリントを作成します。
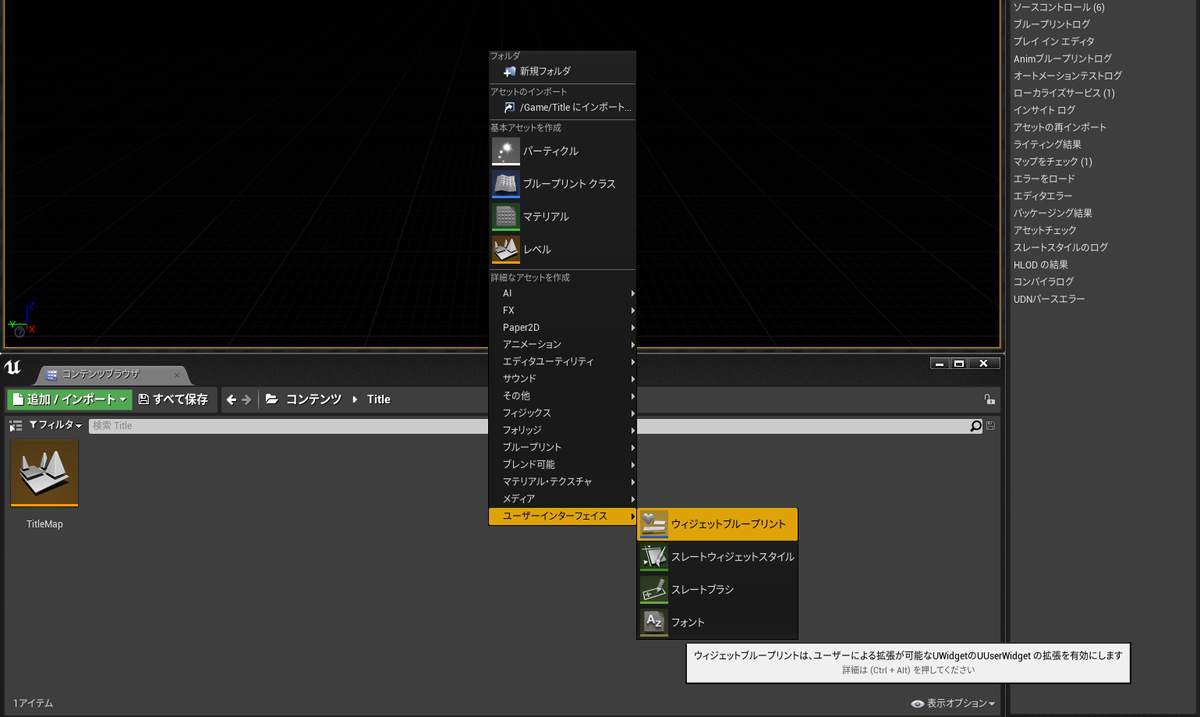
コンテンツブラウザを右クリック → ユーザーインターフェイス → ウィジェットブループリント でウィジェットブループリントを作成する事ができます。
 作成したウィジェットブループリントを開いて適当なテキストを配置します。
1-3 UserWidgetクラスを作る
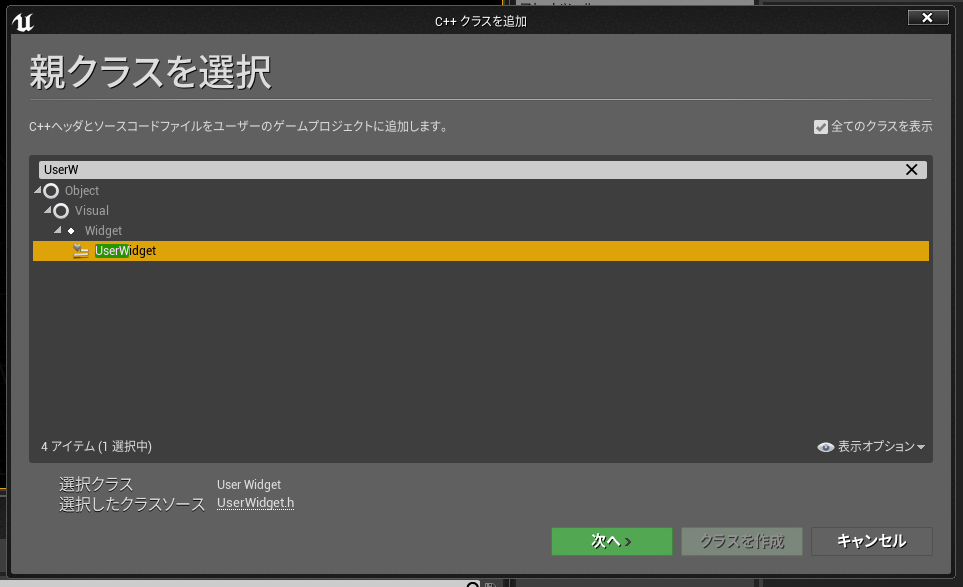 次にUserWidgetクラスを作成します。
ファイル → 新規C++クラス... UserWidgetクラスを継承してソースファイルを生成します。
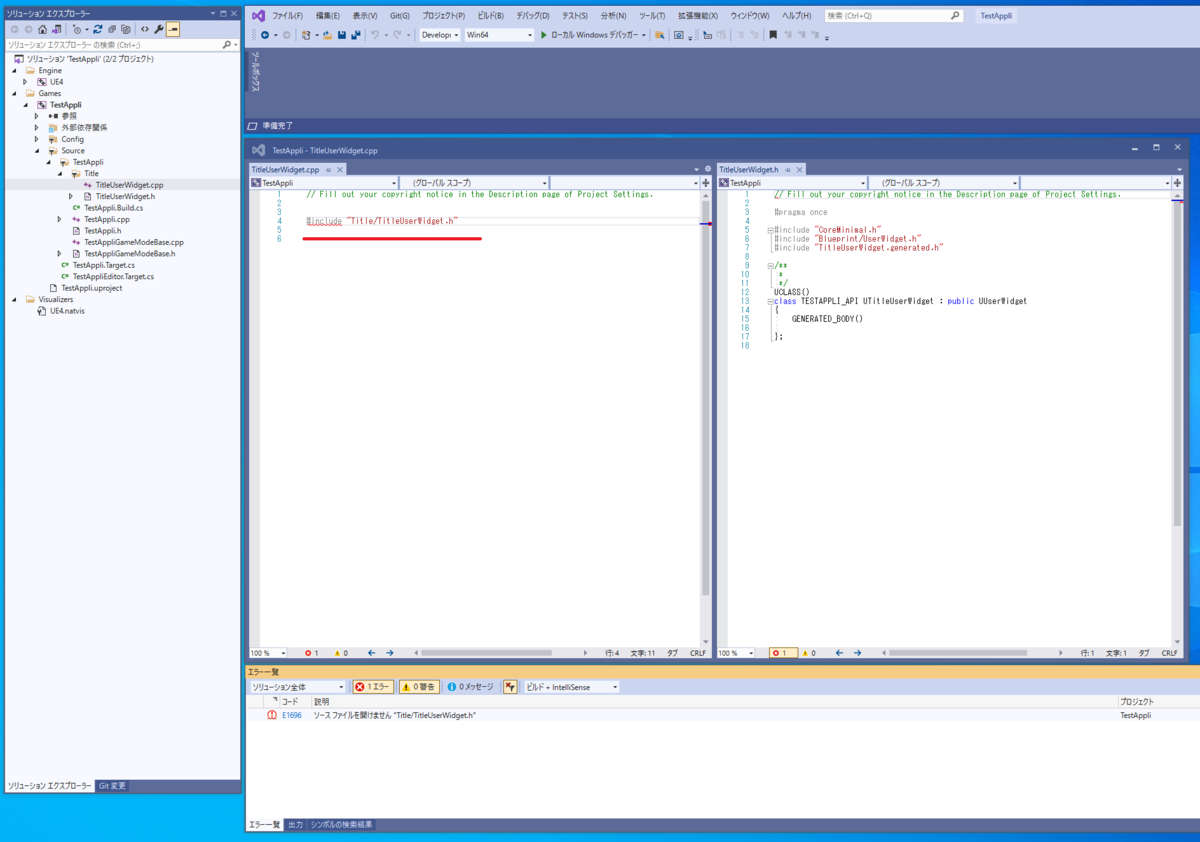 ディレクトリを作成してソースファイルを生成するとコンパイルエラーが出てしまいます。
エラー内容はincludeエラーなのでパスを修正します。
#include "../Title/TitleUserWidget.h"
../を付ける事で修正する事ができます。
1-3-1 ウィジェットブループリントの親クラスの設定
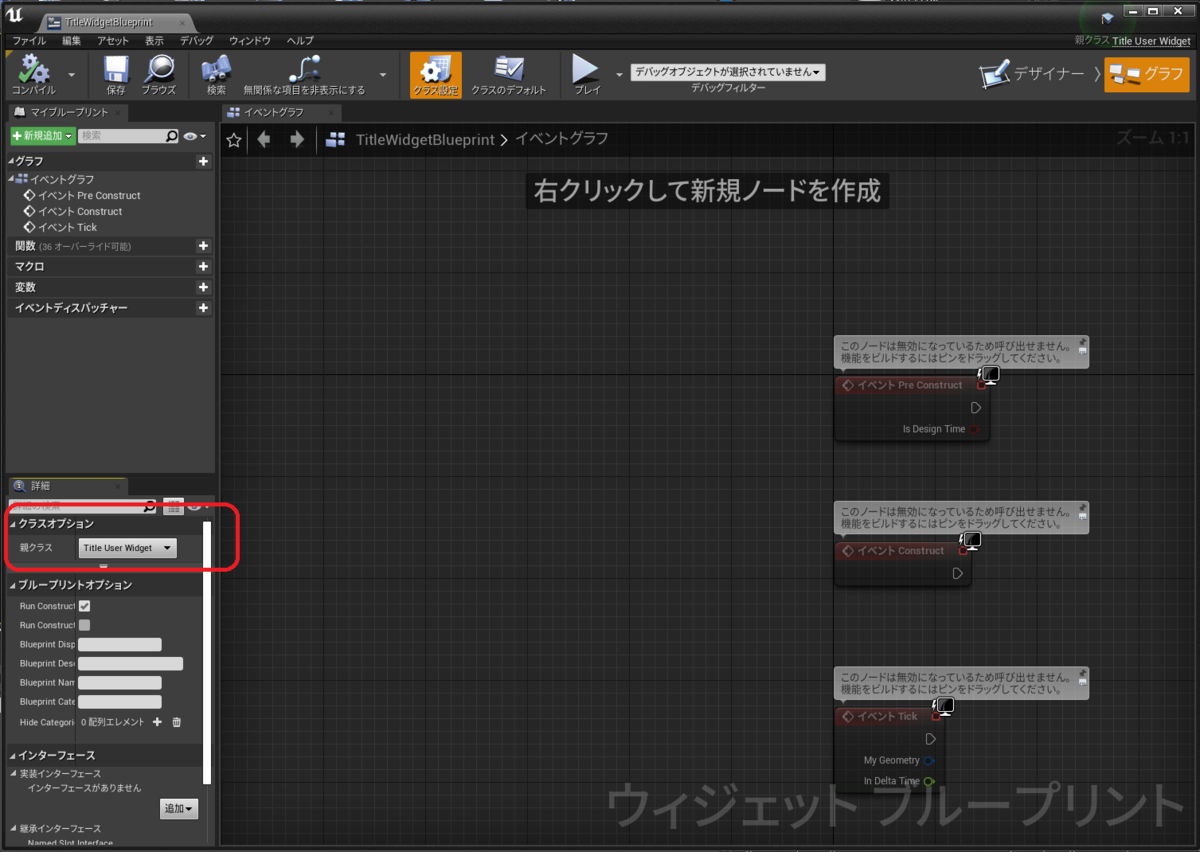 ウィジェットブループリントの親クラスに作成したUserWidgetクラスを設定します。
1-3-2 ウィジェットブループリントのインタラクションの設定
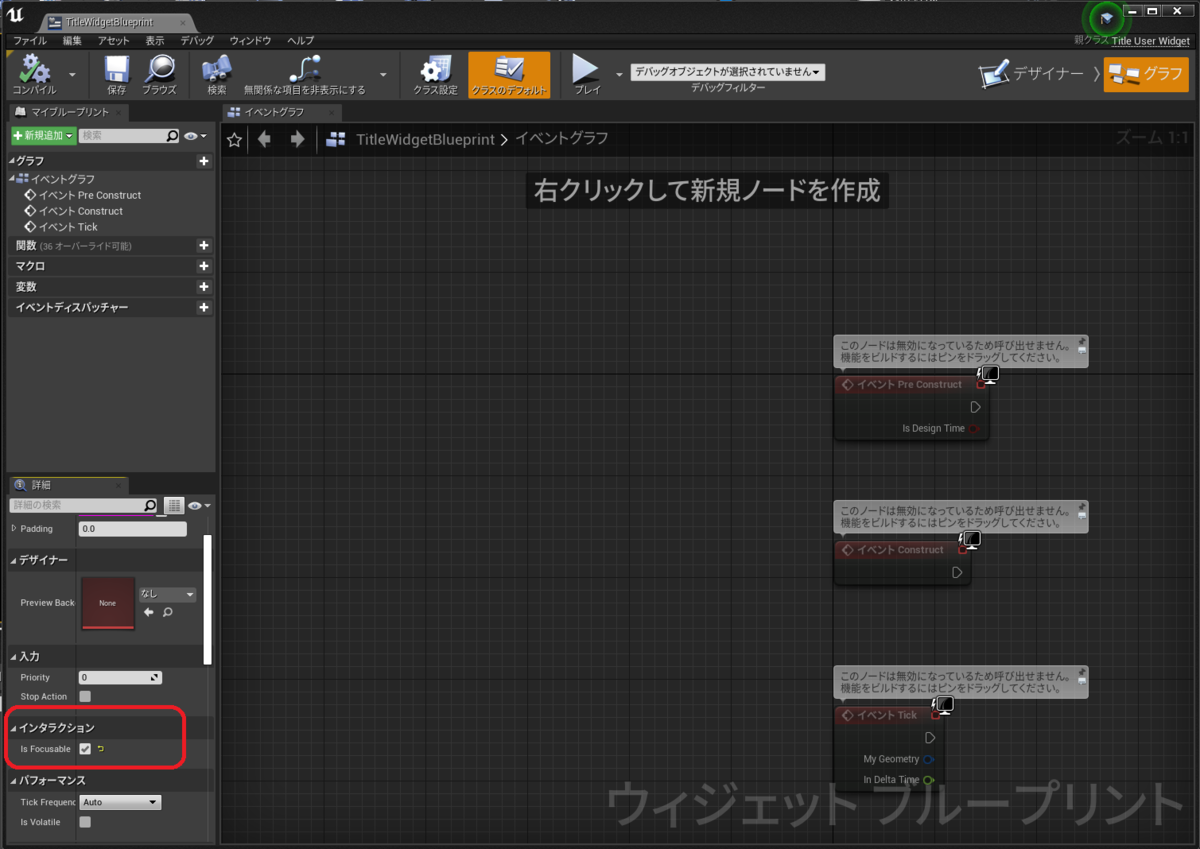 フォーカスがあたるように
 Is Focusable に✅を入れます。
1-4 GameModeBaseクラスを作る
次にUserWidgetクラス同様にGameModeBaseクラスを継承してソースファイルを生成します。
同じくコンパイルエラーが出てしまいますので、includeパスを修正します。
1-5 GameModeを設定する
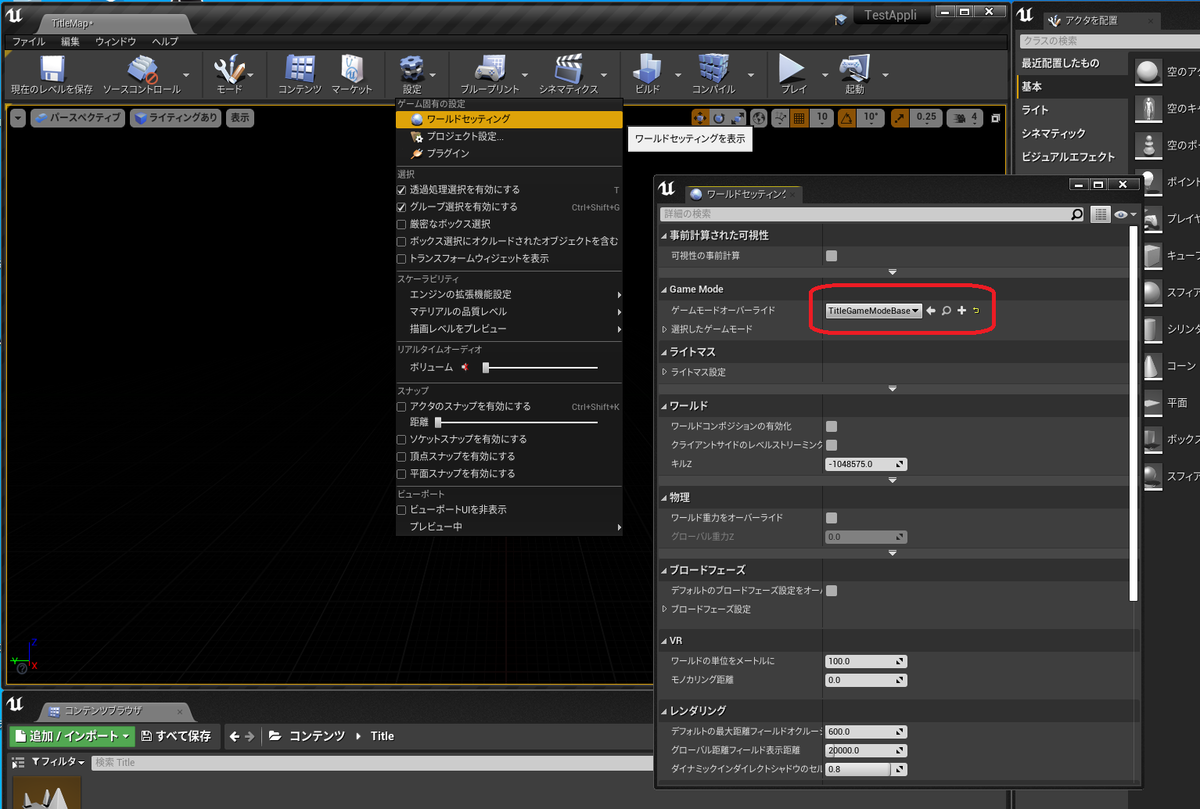 次に先程作成したGameModeクラスを設定します。
設定 → ワールドセッティング → ゲームモードオーバーライド
1-6 PlayerControllerクラスを作る
次にUserWidget、GameModeBaseクラス同様にPlayerControllerクラスを継承してソースファイルを生成します。
1-7 生成したソースファイルを編集する
1-7-1 GameModeBaseの編集
#pragma once

#include "CoreMinimal.h"
#include "GameFramework/GameModeBase.h"
#include "TitleGameModeBase.generated.h"

UCLASS()
class TESTAPPLI_API ATitleGameModeBase : public AGameModeBase
{
    GENERATED_BODY()

public:
    ATitleGameModeBase();

    virtual void StartPlay() override;

private:
    TSubclassOf<class UUserWidget> m_titleUserWidget;
    UPROPERTY()
    class UUserWidget* m_pTitleUserWidget = nullptr;
};
コンストラクタを用意して、StartPlayをoverrideします。
タイトル画面のテキストを表示する為UserWidgetもメンバに持ちます。
#include "../Title/TitleGameModeBase.h"
#include "../Title/TitleUserWidget.h"
#include "../Title/TitlePlayerController.h"

ATitleGameModeBase::ATitleGameModeBase()
    : Super()
{
    PlayerControllerClass = ATitlePlayerController::StaticClass();
}

void ATitleGameModeBase::StartPlay()
{
    Super::StartPlay();

    FString path = "/Game/Title/TitleWidgetBlueprint.TitleWidgetBlueprint_C";
    m_titleUserWidget = TSoftClassPtr<UUserWidget>(FSoftObjectPath(*path)).LoadSynchronous();
    m_pTitleUserWidget = CreateWidget<UUserWidget>(GetWorld(), m_titleUserWidget);
    if (m_pTitleUserWidget)
    {
        m_pTitleUserWidget->AddToViewport();
    }
}
コンストラクタで生成したPlayerControllerを設定します。
StartPlayで作成したウィジェットブループリントをロードしてWidgetを作成します。
作成した後にAddToViewPortを呼び出してビューポートに追加します。
ファイルパスの調べ方はコンテンツブラウザから対象のファイルを右クリックして
リファレンスをコピー するとクリップボードに張り付けられるので
テキストファイルにペーストして確認する事ができます。
1-7-2 PlayerControllerの編集
#pragma once

#include "CoreMinimal.h"
#include "GameFramework/PlayerController.h"
#include "TitlePlayerController.generated.h"

UCLASS()
class TESTAPPLI_API ATitlePlayerController : public APlayerController
{
    GENERATED_BODY()

protected:
    virtual void BeginPlay() override;
};
BeginPlayをoverrideします。
#include "../Title/TitlePlayerController.h"

void ATitlePlayerController::BeginPlay()
{
    Super::BeginPlay();
    SetInputMode(FInputModeUIOnly());
}
BeginPlayの中でSetInputModeを呼び出してFInputModeUIOnlyを設定します。
1-7-3 UserWidgetの編集
#pragma once

#include "CoreMinimal.h"
#include "Blueprint/UserWidget.h"
#include "TitleUserWidget.generated.h"

UCLASS()
class TESTAPPLI_API UTitleUserWidget : public UUserWidget
{
    GENERATED_BODY()

protected:
    virtual FReply NativeOnKeyDown(const FGeometry& InGeometry, const FKeyEvent& InKeyEvent) override;
};
NativeOnKeyDownをoverrideすると入力判定を行えます。
#include "../Title/TitleUserWidget.h"
#include "Kismet/GameplayStatics.h"

FReply UTitleUserWidget::NativeOnKeyDown(const FGeometry& InGeometry, const FKeyEvent& InKeyEvent)
{
    const auto key = InKeyEvent.GetKey();

    if (key == EKeys::Gamepad_FaceButton_Right)
    {
        UGameplayStatics::OpenLevel(this, "TestMap");
        return FReply::Handled();
    }

    return FReply::Unhandled();
}
InKeyEventから入力された情報を取得する事ができます。
ゲームパッドの右ボタンが押下されたらレベルを開いてゲームシーンに切り替えています。
ここでコンパイルすると FReply::Handled() と FReply::Unhandled() のリンクエラーが発生します。
using UnrealBuildTool;

public class TestAppli : ModuleRules
{
    public TestAppli(ReadOnlyTargetRules Target) : base(Target)
    {
        PCHUsage = PCHUsageMode.UseExplicitOrSharedPCHs;

        PublicDependencyModuleNames.AddRange(new string[] { "Core", "CoreUObject", "Engine", "InputCore" });

        PrivateDependencyModuleNames.AddRange(new string[] {  });

        // Uncomment if you are using Slate UI
        // PrivateDependencyModuleNames.AddRange(new string[] { "Slate", "SlateCore" });

        // Uncomment if you are using online features
        // PrivateDependencyModuleNames.Add("OnlineSubsystem");

        // To include OnlineSubsystemSteam, add it to the plugins section in your uproject file with the Enabled attribute set to true
    }
}
プロジェクト名.Build.cs というファイルがあるので
PrivateDependencyModuleNames.AddRange(new string[] { "Slate", "SlateCore" });
この部分のコメントアウトを外すとリンクエラーが発生しなくなります。
2 ゲームシーンを作ってみる
タイトルシーンと同様にレベル、GameModeBaseクラス、PlayerControllerクラスを作成します。
2-1 Characterクラスを作る
タイトルシーンで作ったUserWidgetクラスと同様にCharacterクラスを作成します。
ファイル → 新規C++クラス... Characterクラスを継承してソースファイルを生成します。
2-2 CharacterのBlueprintを作る
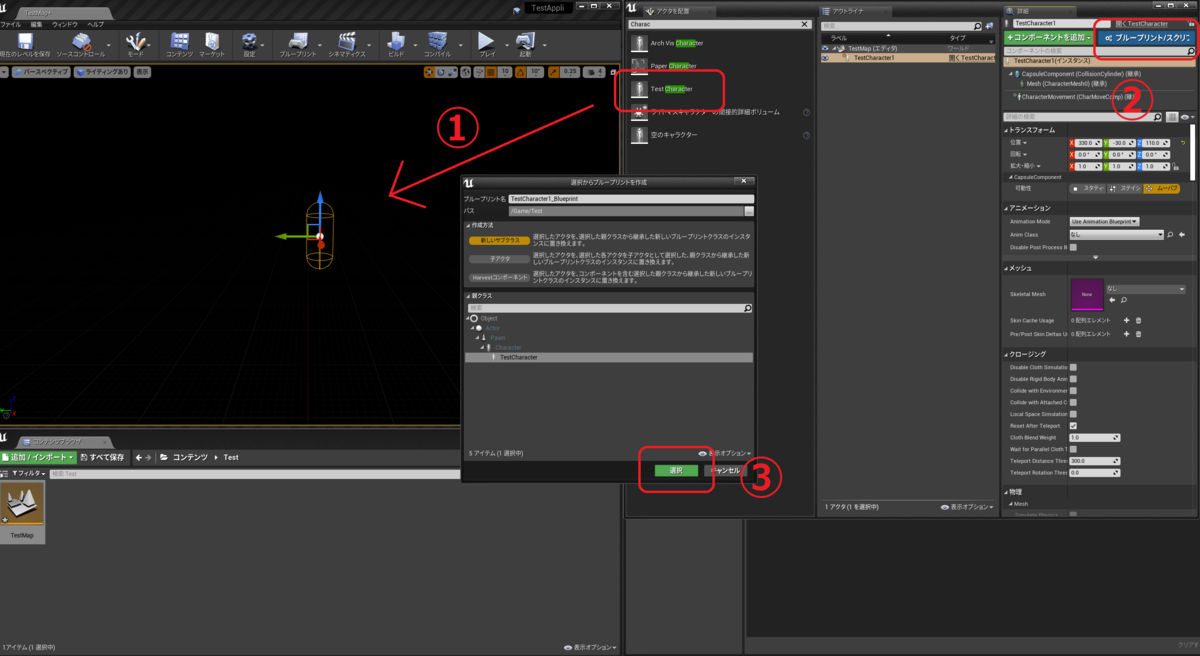 ①作成したCharacterクラスをViewPortに配置します。
②ブループリント/スクリプトを追加をクリックします。
③選択ボタンをクリックします。
2-3 ゲームシーンのソースファイルを編集する
2-3-1 PlayerControllerの編集
#include "../Test/TestPlayerController.h"

void ATestPlayerController::BeginPlay()
{
    Super::BeginPlay();
    SetInputMode(FInputModeGameAndUI());
}
タイトルと異なりキャラクターも動かすので FInputModeGameAndUI を設定します。
2-3-2 GameModeBaseの編集
#include "../Test/TestGameModeBase.h"
#include "../Test/TestPlayerController.h"
#include "../Test/TestCharacter.h"

ATestGameModeBase::ATestGameModeBase()
    : Super()
{
    PlayerControllerClass = ATestPlayerController::StaticClass();

    static ConstructorHelpers::FClassFinder<ATestCharacter> testCharacter(TEXT("/Game/Test/TestCharacter1_Blueprint"));
    if (testCharacter.Class != nullptr)
    {
        DefaultPawnClass = testCharacter.Class;
    }
}

void ATestGameModeBase::StartPlay()
{
    Super::StartPlay();
}
コンストラクタで DefaultPawnClass に作成したCharacterクラスを設定します。
2-3-3 Characterの編集
#include "../Test/TestCharacter.h"
#include "GameFramework/PlayerInput.h"

// Sets default values
ATestCharacter::ATestCharacter()
{
    // Set this character to call Tick() every frame.  You can turn this off to improve performance if you don't need it.
    PrimaryActorTick.bCanEverTick = true;

}

// Called when the game starts or when spawned
void ATestCharacter::BeginPlay()
{
    Super::BeginPlay();

}

// Called every frame
void ATestCharacter::Tick(float DeltaTime)
{
    Super::Tick(DeltaTime);

}

// Called to bind functionality to input
void ATestCharacter::SetupPlayerInputComponent(UInputComponent* PlayerInputComponent)
{
    Super::SetupPlayerInputComponent(PlayerInputComponent);

    UPlayerInput::AddEngineDefinedActionMapping(
        FInputActionKeyMapping("FaceButtonRight", EKeys::Gamepad_FaceButton_Right));
    PlayerInputComponent->BindAction("FaceButtonRight", IE_Pressed, this, &ATestCharacter::PressFaceButtonRight);
    PlayerInputComponent->BindAction("FaceButtonRight", IE_Released, this, &ATestCharacter::ReleaseFaceButtonRight);

}

void ATestCharacter::PressFaceButtonRight()
{
    UE_LOG(LogTemp, Log, TEXT("PressFaceButtonRight"));
}

void ATestCharacter::ReleaseFaceButtonRight()
{
    UE_LOG(LogTemp, Log, TEXT("ReleaseFaceButtonRight"));
}
SetupPlayerInputComponent関数内でボタンが押された時のアクションをバインドします。
今回はゲームパッドの右ボタンが押された時にPressFaceButtonRightとReleaseFaceButtonRightが呼び出されるようにしてログ出力をしています。
3 動かしてみる
3-1 タイトルシーン
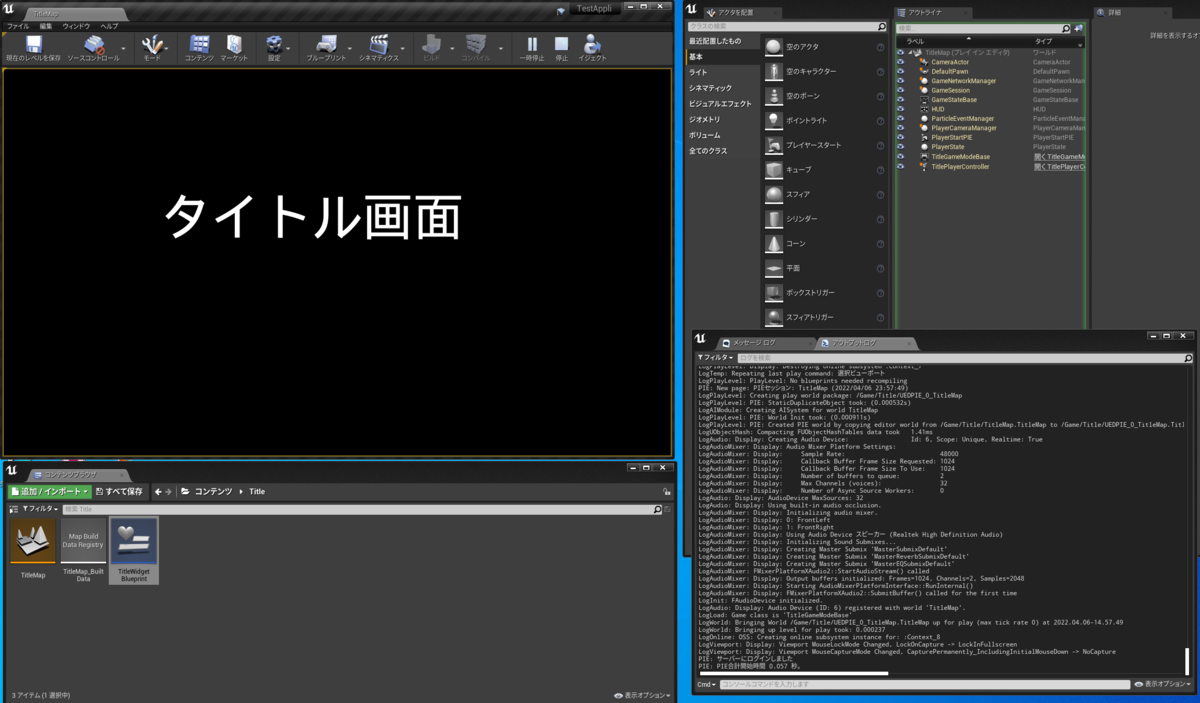 タイトルシーンを起動するとウィジェットブループリントを作成して配置したテキストが表示されています。
ゲームパッドの右ボタンを押すとゲームシーンに遷移します。
3-2 ゲームシーン
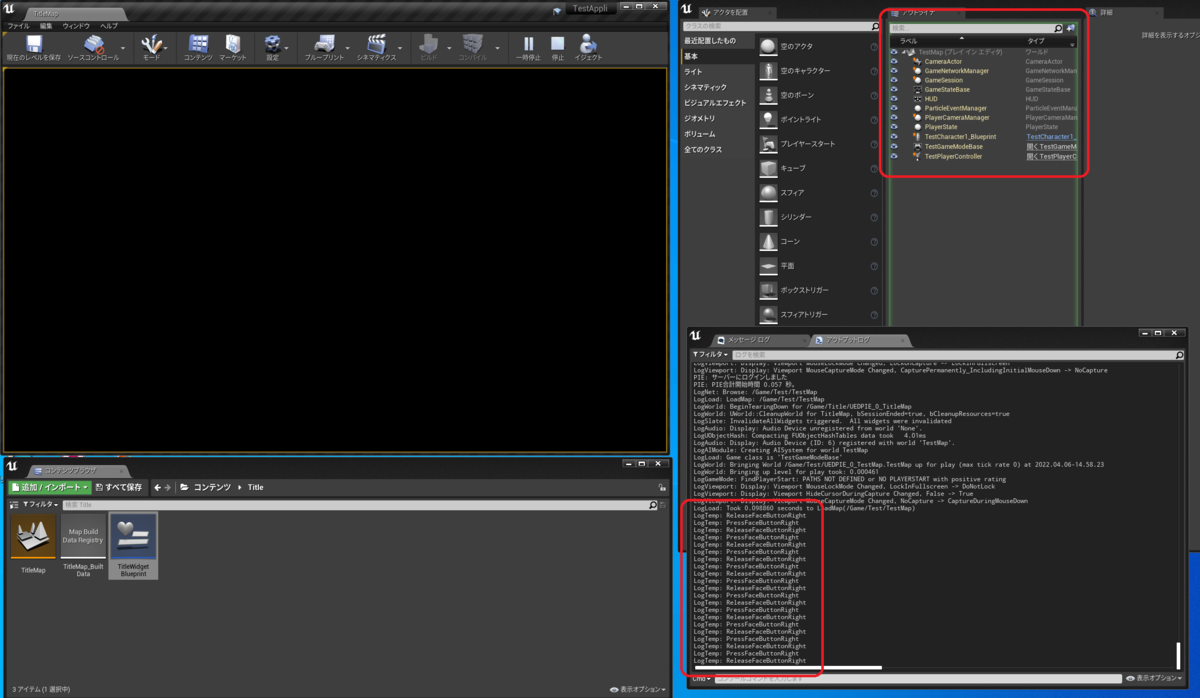 ゲームシーンでは何も表示していないので黒い画面が表示されるだけです。
アウトライナで配置されてるものを確認するとタイトルシーンのものとは変わっているのと、
ゲームパッドの右ボタンを押すと仕込んだログが流れている事から、
シーンが切り替わっている事がわかります。
最後に
今回は2つのシーンを作成して、シーンの切り替え、UIの表示、ゲームパッドの入力などをコードベースで作成してみました。
本来はシーンの切り替え時ならばフェードを挟んだり、リソースの読み込み時にはローディングアイコンを出したりと、いろいろと考えて実装する事が山ほどありそうですが今回はいったん置いておきます。
この記事が、これからC++でゲームを作っていこうと考えている人のきっかけになれたら幸いです。